Postingan

Menampilkan postingan dari Juli, 2016

Lighting 102 Has Been Completely Updated

Hey folks, Thank you for your patience as we worked to fold the newly revised Lighting 102 module into the site, with all of the requisite cross-linking, etc. I know this probably resulted in a flurry of emails and RSS notifications to the site's subscribers. Apologies. The all-new Lighting 102 is up and running. I hope you find it helpful. Thanks, David Hobby Strobist.com
Lighting 102: One More Thing

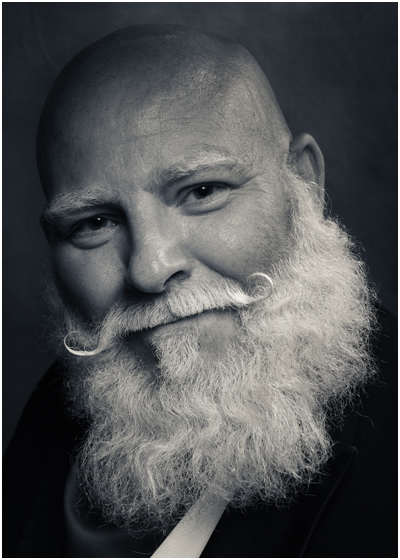
In Lighting 102, we have learned some of the basic physical controls that we can apply to light: angle, distance, size, restriction. We learned how to create a pre-existing fill environment with one light, and then augment that with a second light to add shape and form: One light for shape, another for detail. We've also learned how to identify and control the zones of light that fall onto our subjects: diffused highlight, specular highlight, diffused shadow, diffused highlight to shadow transfer. But there is another control lever that is more complex, more powerful and more evocative than all of the ones listed above: the color of the light. And color is the focus of our next segment, Lighting 103. Are you ready? Good. Let's go. Next: Lighting 103

Lighting 102: Restriction

Gambar
Abstract: It's more interesting on the Dark Side. Restricting light is a powerful control. By taking light away, we can evoke character or drama or mystery or any number of other things. My friend Joe McNally goes as far as to distill it down to this: Read more »

Lighting 102: Side Effects

Let's jump off this train for a minute and think about our different lighting controls in context with each other. More specifically, let's look at size and distance. Read more »

Lighting 102: Controlling Specular Highlights

Gambar
Abstract: Manipulating the reflection of a light source is an underused-but-effective tool. We have all had to deal with specular highlights, even if we did not know what they were called. Think about portraits of people you have made in direct sunlight. Remember that glaring spot on their face or forehead? That was the specular highlight of the sun. And if the person was sweating or had oily skin it only made matters worse, as that sheen is very efficient at throwing back a hard specular. That reflection is a function of the intensity of the light source. More specifically, think of it as intensity per square inch. And understanding this starts to tell us how to control it. Read more »

Lighting 102: In the Zone

Gambar
Abstract: On any lit object, there are four distinct zones of light. Photo by Kenneth Lau When you light any three-dimensional object, you create various zones of light and shadow. It doesn't matter if it is a face or a tomato. So today let's learn from this tomato, photographed by Strobist reader Kenneth Lau. Read more »

Lighting 102: Understanding Soft Light

Gambar
Abstract: To better understand soft light, take a walk across your subject's face. So what is it that actually makes a light soft? And why is it a function of both size and distance? In the portrait above, Dean is being bathed in soft umbrella light from camera right. But let's zoom in a little closer and place some waypoints on his forehead... Read more »

Lighting 102: Apparent Light Size

Gambar
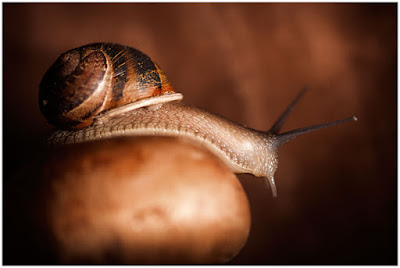
Abstract: It's not how big your light is , it's how big your light looks to your subject. This is Gary. Gary is a snail. And he's beautifully lit by my friend Sara Lando. While babysitting Gary for a friend, Sara decided to actually build a miniature set and then photograph the snail in the style of Irving Penn. Because this is what creative people do in their spare time. And pray tell, what beautifully soft light source is she using to subtly caress Gary and reveal his form? Oh look, it's a bare speedlight: Read more »

Lighting 102: Combining Distance and Two Lights

Gambar
Abstract: Using one light very close combined with another light further away creates a gradient with a built-in safety net. By using a second light to ensure legibility in the shadows, we can place a "floor" on how low the tones will go on our subject. But we can also combine this with the fast falloff of a closely placed key light to get total control of a subject with an inherently tough dynamic range. Read more »

Lighting 102: Distance

Gambar
Abstract: A light placed very close to your subject behaves differently than a light placed further away. Just like your focus, light has depth of field. For this layer of control, we are going to look at two different pictures. Everything will be the same except for one thing: The distance from our light to our subject will change. Nothing else. In particular, the subject-to-background distance will not change. Exhibit number one is a dark portrait of Dean, situated a few feet in front of a white wall, pictured above. White wall? Yes, white. But it doesn't look white, does it? Read more »

Lighting 102: Angle

Gambar
Abstract: Working in an environment of controlled fill light opens up all kinds of options for your key light. The legibility from our fill light doesn't call attention to itself. It just makes your other light look that much better. It introduces a balance; a range; a relationship between the two lights. Think of it like a backup band behind a soloist: the band is there to fill in the gaps, add background and make the soloist sound even better. Fill light is the music machine to your drunken karaoke key light. So just like we did in Lighting 101 , lets take a walk around the block and explore some lighting angles. For consistency, we are going to keep the same key light source for every photo on this page. So it is just about the lighting angles — i.e., no other variables. Read more »

Lighting 102: Shape and Detail

Abstract: When you are using two lights effectively, each one does a very different job. __________ "One light for shape, another for detail." This simple concept, which I learned from photographer Jim Richardson about 25 years ago, forever changed the way that I thought about lighting. It's like a switch was turned on inside of my brain. Read more »

Lighting 102: The Two-Light Kit

Gambar
Abstract: Adding a second light is inexpensive, vastly expands your lighting repertoire, and gives you backup in the case of a lighting equipment failure. If you are working with one light, you already know that a single light can create many possibilities but also can force compromises. Do you place the light for creating the best shape for someone's face? Or do you cheat it a bit to minimize those deep shadows you just created? Read more »

Lighting 102: Introduction

Gambar
Welcome to Lighting 102. If you are here, you should already have completed Lighting 101 , and be familiar with its concepts. __________ In lighting 101 we learned the basics of getting our light off-camera, how to sync it, and how to position it to reveal form. In Lighting 102 we'll go beyond those basics. You'll learn how to create shape and form while at the same time controlling your light throughout the three-dimensional space within your photo. Read more »

Publishing Today and Tomorrow: Lighting 102 v.2.0

Hey folks, Things may have appeared rather quiet around here, but there is a lot going on under the hood. You'll remember that in 2014 Strobist transformed from a 2x/week blog to more of a knowledge bank. This was done to create the time and space to develop other projects. The latter has included things like The Traveling Photographer and the Photographer's Oil Collective , both of which are off and running. But the flipside of this change in rhythm at Strobist was also to be able to put more time into the larger chunks of the site as opposed to day-to-day posting. I want to keep growing and improving the larger modules that create the real long-term value at Strobist, rather than just posting for posting's sake. To that end, today and tomorrow a completely revised and updated Lighting 102 series will be debuting on Strobist. Apologies in advance for the feast-or-famine situation in your RSS feed or inbox. I have been working on the L102 redo for a while now, along with ...

DIY: $10 Custom Wooden Backdrop Mount

Gambar
Do you have painted canvas backdrop, or other textile, that you use for portraits? Why clamp it up to a crossbar (and crop the top) every time you use it, when for about $10 you can build a permanent wooden mounting bar that begs to be included in the frame? Such was this morning's project. Read more »